
Make Your Own Limoncello
I don’t remember the first time I tried limoncello, but I do remember the first time I tried limoncello that I LOVED. I was in Italy, the home of this wickedly delicious liqueur. Specifically, I was in Florence, which is in the north of Italy where this drink is sometimes called limoncino. Traditionally, limoncello has been served after a meal as a digestif. This stuff is delicious, so although perfect for sipping after a meal, it’s great all the other hours of the day too. Limoncello has a relatively high alcohol content, so it can also be used as a big punch of flavor in cocktails and martinis without watering them down.
I’ve been making and bottling my own limoncello for several years. It is relatively easy to make a batch at home; it just takes time – about 2-3 months, which will give you around 2 ½ liter bottles. It’s always nice to make something on your own, and in the case of limoncello, a homemade batch is noticeably better than most of the stuff you can buy off-the-shelf. I also find homemade limoncello to be the perfect gift for friends and family.

I have a strong opinion around the base ingredient of limoncello. In my opinion, the base ingredient should be grain alcohol, 150 proof or higher. I know this may seem a bit scary – in fact some areas don’t even allow the sale of this type of alcohol, but to get the best, most flavorful limoncello, grain alcohol is the place to start. There are some recipes that I’ve seen that call for vodka as the base ingredient. As you’ll see further in the process, the alcohol is diluted with about 4 cups of simple syrup to a bottle (750ml) of grain alcohol, so the final alcohol content is much closer to a typical spirit. This becomes important for storing and keeping your limoncello. This drink is best kept in your freezer, served nice and chilled. If you started with vodka, your end product could become slushy and frozen if kept in the freezer because of the additional liquid added.
When it comes to the brand of grain alcohol, I don’t think it really matters. Everyone seems to be most familiar with Everclear, but there are other brands available. I’ve used both Everclear, and a Polish brand Polmos Spirytus Rektyfikowany. I tend to buy whichever has the best price that day. Just be sure to check the proof before you buy. In Chicago, I can get 151 proof for both of those brands. Anything higher would require me to leave the city. I have used 180 proof before, and this recipe works fine.
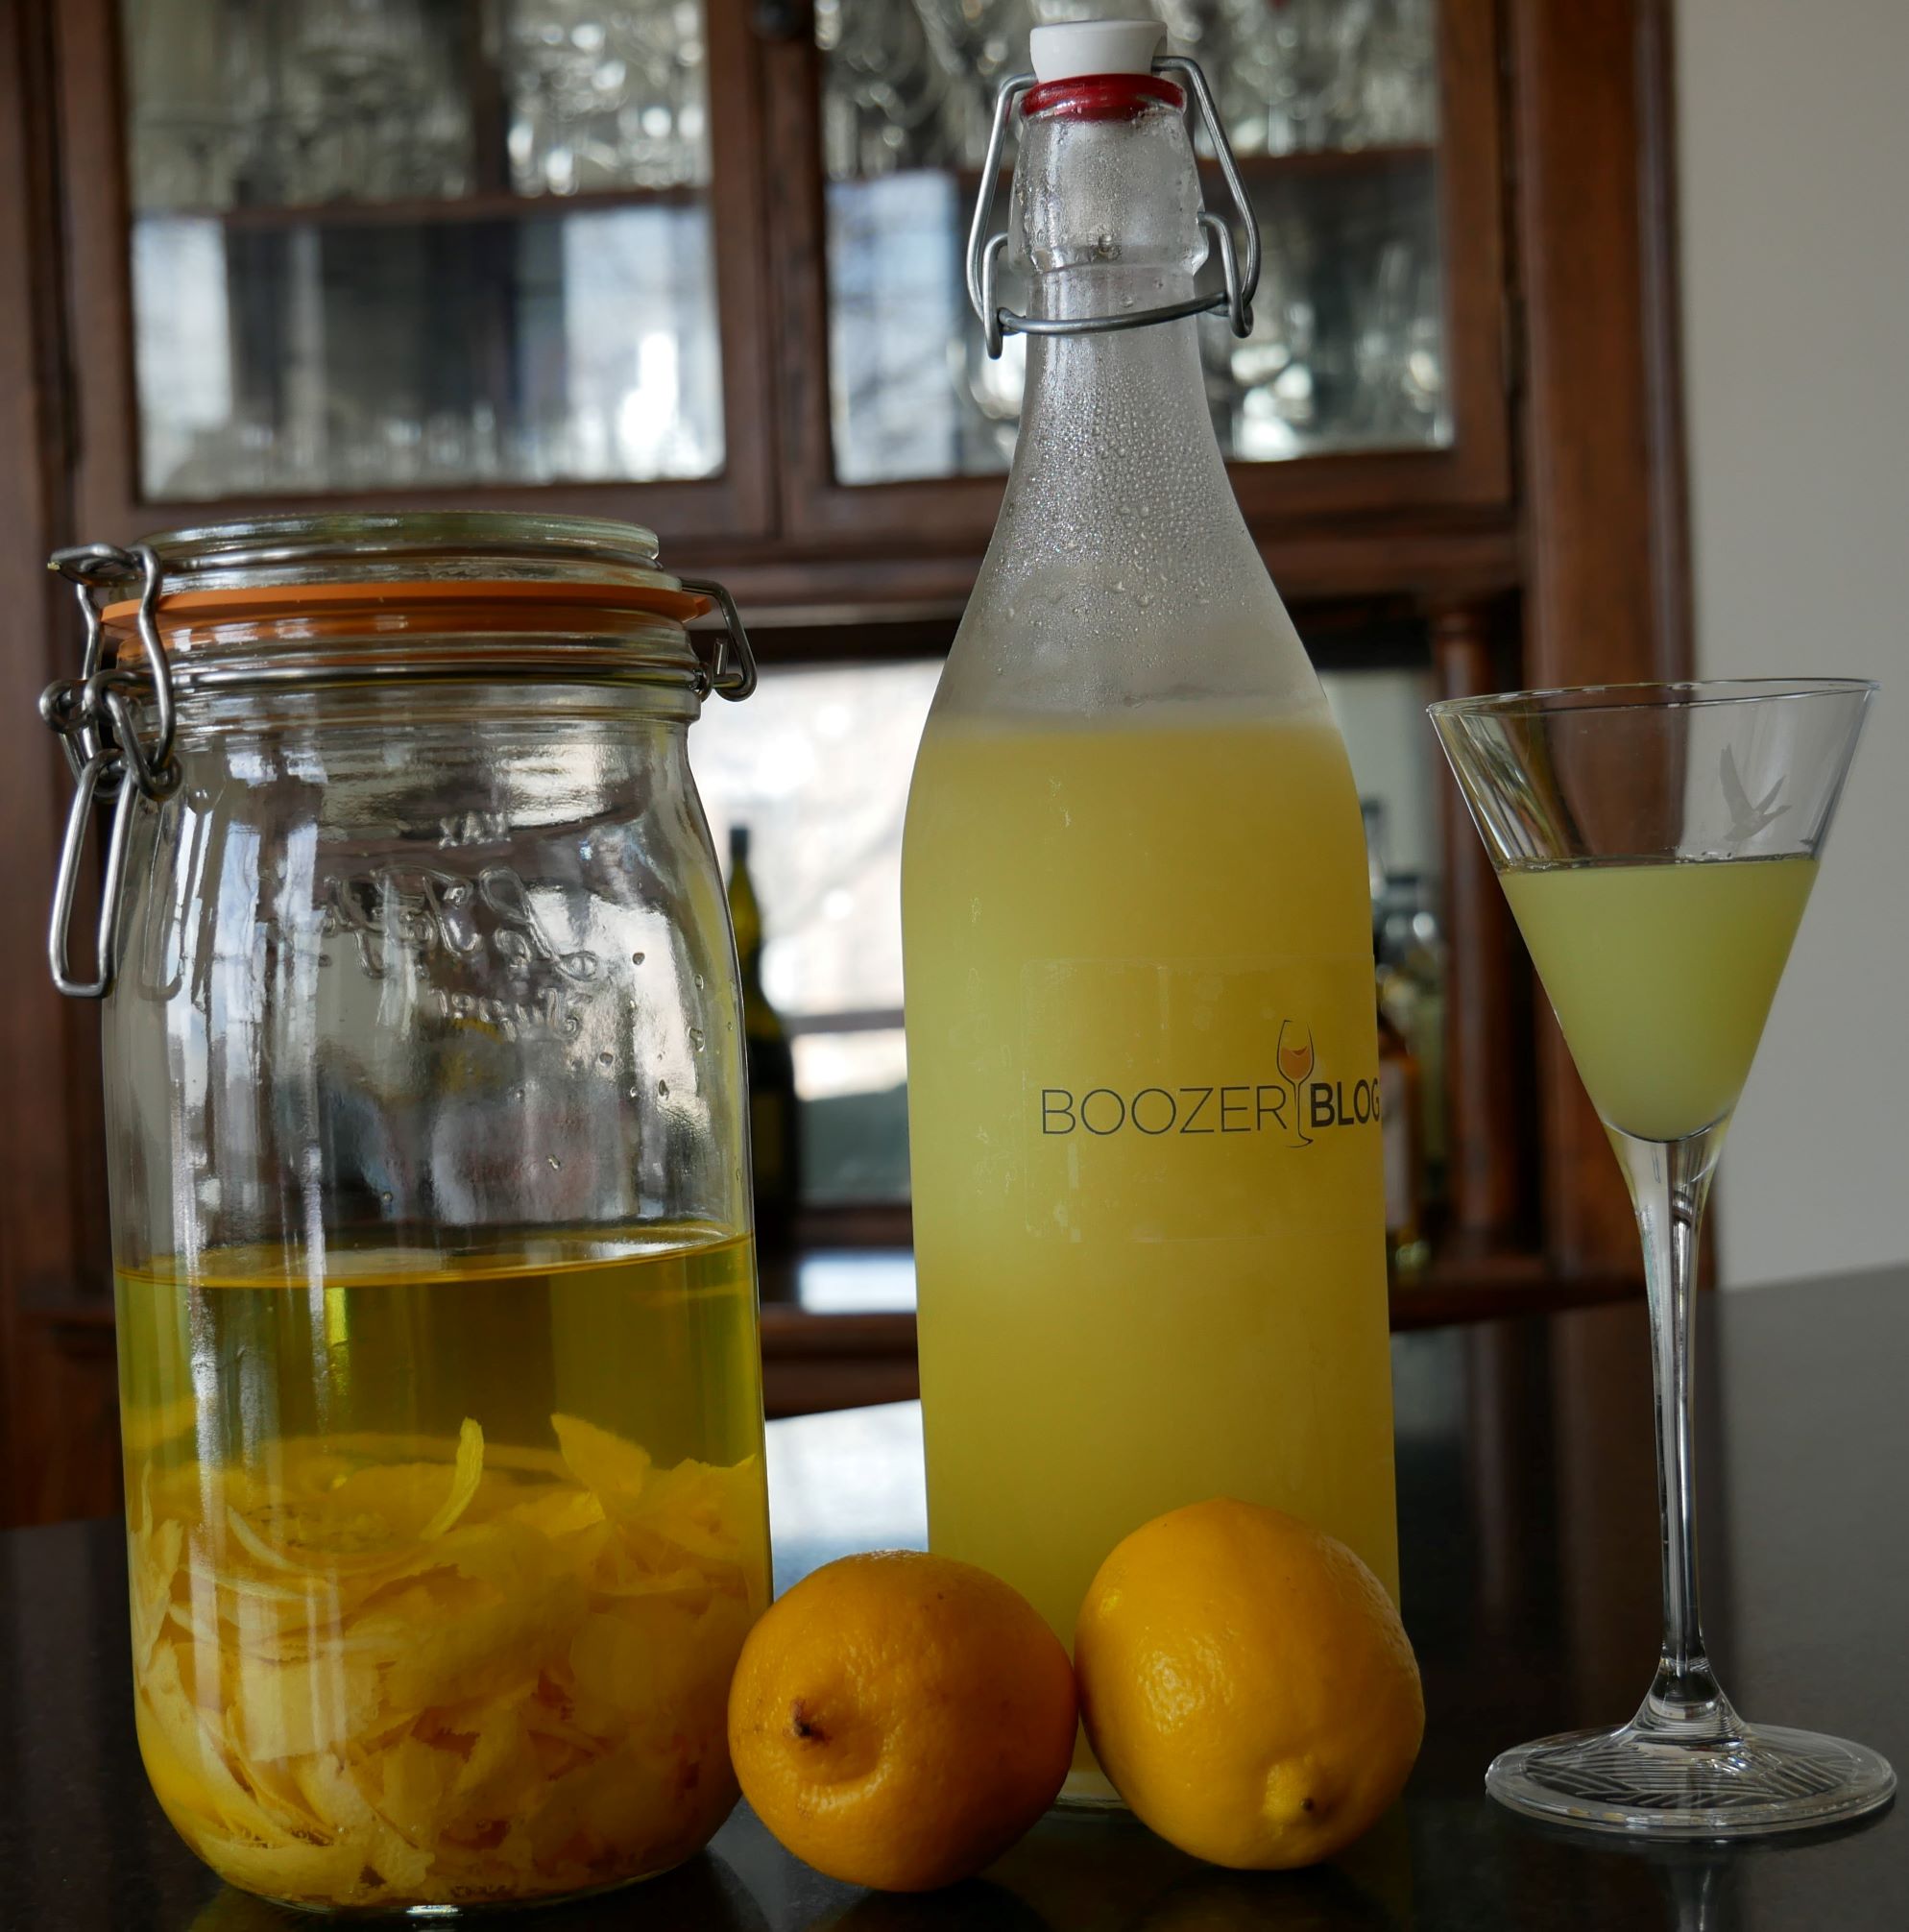
Limoncello has an intense smell and taste of lemon, which makes it surprising that this delicious concoction contains no lemon juice. The lemon flavor comes from the oils within the peels of the lemons that infuse the grain alcohol. This infusion process is what takes the most time. When you let the peels of the lemons sit in the alcohol in a jar for at least 6 to 8 weeks you can watch the peel turn pale, as the alcohol turns a deep yellow.  This infusion process is also why it is important to use a glass jar (not plastic) and to use organic lemons. The glass jar so that you don’t have any chemicals leeching in from a plastic container, and organic lemons so that you don’t have any sprays or pesticides applied to the peel that could leech into the alcohol.
As for the type of lemon, your biggest concern is that they are organic. Of course, traditionally, limoncello would be made with varietals native to Italy like Sorrento lemons. Meyer lemons are native to China and a hybrid mix between a citron and a mandarin. In the end, different lemons will make a slightly different limoncello, which is all part of the fun of making your own unique liqueur. I don’t usually have a choice when I’m shopping for organic lemons, so I take whatever happens to be stocked that day. I use 10-11 lemons for each bottle (750ml) of alcohol and use a potato peeler to take off the peel of the lemon, being careful not to cut into the white pith. If you do catch some of the pith, best to discard it and not put it in the alcohol. The pith can turn the limoncello bitter.
Once you put the grain alcohol and lemon peels into a sealed glass jar, time to put the jar in the refrigerator and wait. I don’t have a cool basement/cellar, so I’m stuck keeping this in my fridge. Don’t keep this in the freezer or the oils may not fully infuse the alcohol. As I mentioned earlier, this part of the process takes 6-8 weeks minimum. If you have the patience, 12 weeks will ensure full infusion. I give the jar a periodic shake to make sure the peels are getting the full exposure to the alcohol. Another lesson learned on this step: You may want to warn your partner, spouse, roommate or whomever may come across this jar in the fridge. After a few weeks, it will look like limoncello. The uniformed may think it’s limoncello. A taste test during this step will not go well for them.
My first time making limoncello, I played it safe, and made a single batch, and got 2 ½ liter bottles filled. This stuff is so popular, and it takes time to make, so I’ve never made a single batch since my first. My largest batch was a triple. A word of wisdom – check the size of your pots before you decide how big of a batch you intend to make. The infused alcohol and the simple syrup need to be mixed together, and it is best to mix this in a single container to ensure you have the right alcohol-to-syrup ratio. As it turns out, a triple batch is my max capacity with my current set of pots.
 For the syrup, mix 4 cups of water with 3 cups of sugar in a pot and put over low heat. Once the sugar dissolves, let the syrup cool. Once cool, strain the infused alcohol, removing all the peel mixing the alcohol with the syrup. By this point, the infused alcohol is a deep yellow color. When mixed with the syrup the color becomes a bit cloudy. Not to worry. There are still a few weeks left in the process, and your liquid gold just needs some time to settle. The choice of 4 cups of water to 3 cups of sugar is one that I’ve landed on over time. You can adjust this to suite your tastes, either adding more sugar, or less. The 4 cups of water, I suggest you keep a constant.
When it comes time to bottle your limoncello, any bottle or jar will work, as long as you can seal the lid. I went online and got a box of bottles with rubber lined stoppers for lids several years ago that I’m still using. In retrospect, I would have preferred to mix up the size of the bottles, since I like the larger bottles for efficient storage in my freezer, and I would like smaller bottles for gift giving. In lieu of smaller bottles, I’ve used mason jars. If buying bottles isn’t appealing to you, just reuse the bottles that come through your home. I’ve found the ready-made sangria bottles perfect for reuse, since they come with the reusable stopper which ensures a good seal. Wine bottles would work too.
I use a funnel and a liquid measuring glass with a pouring spout to fill the bottles. Everyone seems to have a measuring glass; I got my funnel at the drug store. Once your bottles are filled and sealed, put them in the fridge for another one-to-two weeks. During that time you’ll notice the cloudiness will dissipate, and that beautiful yellow color comes through.
Final step: Put your bottles in the freezer, chill and enjoy!


Pingback: prix le moins cher kamagra
Pingback: order enclomiphene canada no prescription
Pingback: how to buy androxal uk buy online
Pingback: online order flexeril cyclobenzaprine generic extended release
Pingback: dutasteride without a perscription canadian
Pingback: how to buy fildena canada no prescription
Pingback: ordering gabapentin generic gabapentins
Pingback: get staxyn usa where to buy
Pingback: purchase avodart generic efficacy
Pingback: cheap xifaxan generic for sale
Pingback: how to order rifaximin canadian online pharmacy
Pingback: kamagra platit